Instructions for HTTPS Sites
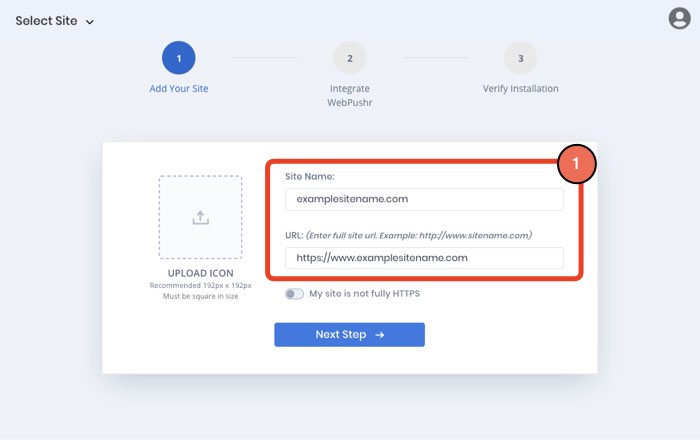
Step 1: Add Site in Dashboard
Add your new site in Webpushr Web Console by entering following two:
Site Name. This is the name of your site.
Site URL. URL to your homepage.
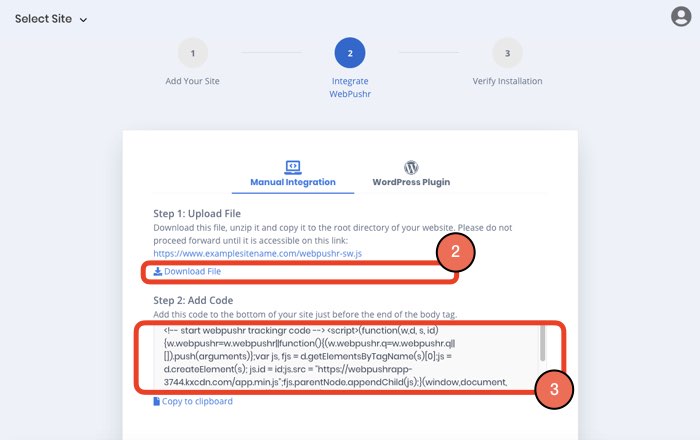
Step 2: Upload Service Worker to Root Directory (HTTPS sites only)
Download the service worker file from the link shown in the image below and upload it your site's root directory. This step is mandatory all Push Notification API providers will require you to upload this file. Click here to learn more about the service worker file.
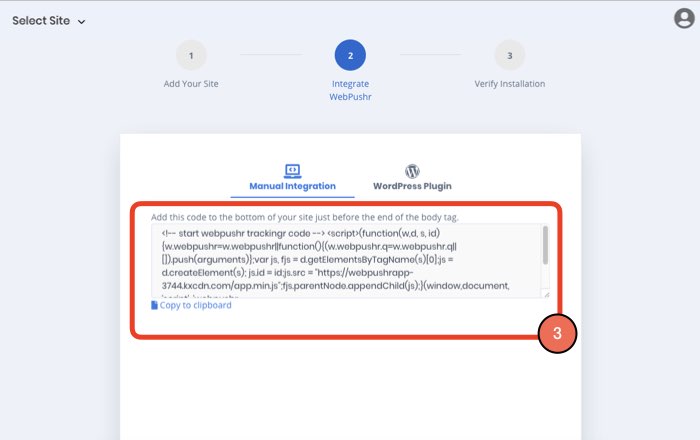
Step 3: Add JS Snippet to Footer
Copy the JS Snippet as shown in the image below and paste it to your site's footer. Make sure this snippet runs all ALL pages of your site and not only the ones where you want notification prompt to show.
Instructions for HTTP Sites
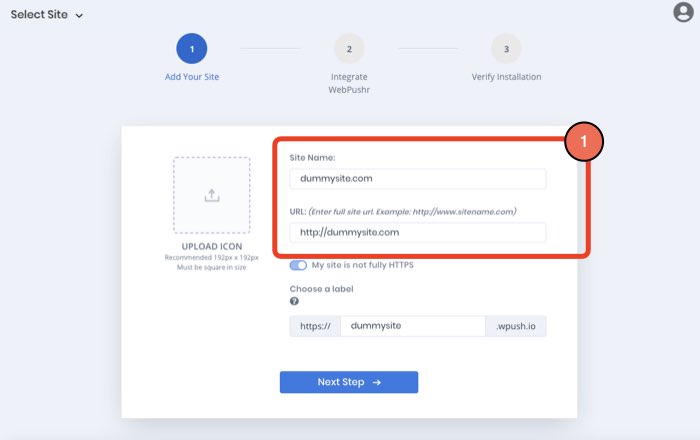
Step 1: Add Site in Dashboard
Add your new site in Webpushr Web Console by entering following 3:
Site Name. This is the name of your site.
Site URL. URL to your homepage.
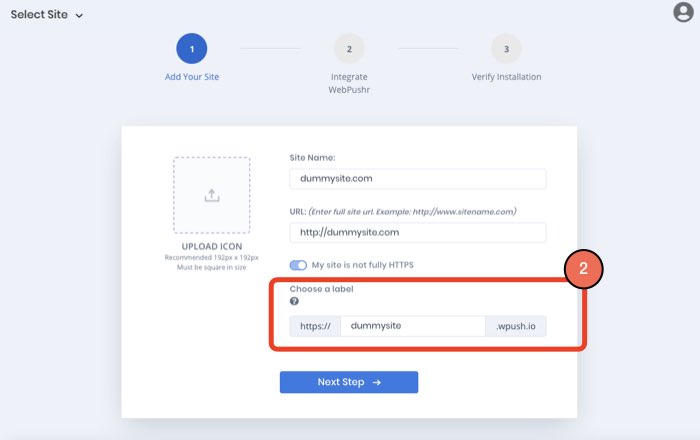
Step 2: Select a Label
We will create a custom HTTPS subdomain for your site. This is necessary because web push notifications only work on HTTPS sites. We work around this by creating a custom subdomain that is on HTTPS for you, that is then used to subscribe users and send them push notifications.
Step 3: Add JS Code to your site
Copy the JS Snippet as shown in the image below and paste it to your site's footer. Make sure this snippet runs all ALL pages of your site and not only the ones where you want notification prompt to show.
Validate Integration with our troubleshooter
You can use our Integration Troubleshooter to test integration.